I keep a little repair kit in my wardrobe drawer — a spare spool of thread, a needle, a tiny pair of scissors and a tube of fabric glue. Over the years I’ve learned that taking five or ten minutes to fix something at home can save a favourite piece from the charity bag and quietly extend its life for seasons to come. Below I share the simple, practical repairs I do myself, the little tricks that make them easier, and when it’s worth sending something to a professional. These are the same fixes I’ve tested on everything from vintage finds to high-street dresses.
What’s in my home mending kit
Before we start, here’s what I keep handy. You don’t need much to do most everyday repairs:
- Sewing needles (a few sharp and a few ballpoint for knitwear)
- Thread in basic neutrals + a couple of accent colours
- Small scissors or snips
- Spare buttons and fabric-safe glue (like Textile Glue or Tear Mender)
- Iron-on hem tape and a small iron
- Bias tape and elastic (10–20mm)
- Pilling comb or fabric shaver
- Needle felting tool (optional, excellent for stabilising knit holes)
- Patch fabric (denim, cotton, leatherette scraps)
Reattaching a button quickly and neatly
Buttons fall off suddenly, usually at the worst moment. I always reattach using the original thread path if possible — it keeps the button sitting correctly. Use a sharp needle and a length of thread about as long as your arm. Knot one end, push from the underside, and sew through the button holes several times until it feels secure. For heavier coats or if you want the button to sit slightly away from the fabric (so the buttonhole can sit comfortably), wrap the thread several times around the stitches under the button to form a shank.
Fixing a loose hem without sewing
For a popped hem, often iron-on hem tape is a lifesaver. Press the hem flat, tuck the hem to the correct length, slide a strip of hem tape between layers and press with a hot iron for the time recommended. It’s perfect for emergencies and works well on most cottons and poly blends. For delicate fabrics like silk, I prefer hand-stitching with tiny blind stitches so the mend is invisible.
Quick zipper fixes
If a zipper is stuck, rub a pencil lead (graphite), soap, or a candle along the teeth to lubricate. If the zipper pull has come off the track but the teeth are intact, you can often re-thread the pull by gently guiding the teeth back into the slider with tweezers. If the teeth are damaged, replace the zipper or take the garment to a tailor — it’s a small investment that saves a coat or favourite dress.
Mending small tears and holes
Small holes in woven fabrics can usually be closed with a few neat stitches. For knits, use a darning stitch or a needle and matching yarn to weave the gap closed. I sometimes use a small iron-on patch on the inside for extra stability, especially on areas that get stress like the inner thigh or elbow. For jeans and heavier fabrics, a visible patch can be stylish: I use contrasting denim or a vintage fabric scrap and topstitch it in place — it becomes a design detail rather than something to hide.
Darning socks and filling worn elbows
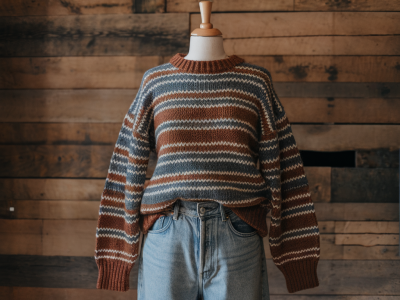
I darn socks using a needle and matching sock yarn. Stretch the sock over a darning mushroom or small jar, and weave horizontal threads across the hole, then weave vertical threads through them to form a woven patch. For sweater elbows, I cut a patch from cotton jersey or suede (for more structure) and hand-stitch it down so it follows the sleeve shape. These mends are both practical and, when done in a contrasting thread or fabric, charmingly visible.
Dealing with pilling and fuzz
Pilling makes even a loved jumper look tired. A fabric shaver or pilling comb removes bobbles in minutes. I always test on an inside seam first. For cashmere and wool, I prefer a gentle combing with a soft pilling comb — it preserves the yarn and keeps the knit looking fresh. Regularly brushing knits with a clothes brush also prevents pilling by removing surface fluff.
Replacing elastic in waistbands
Elastic stretches out over time, but replacing it is straightforward. Make a small opening in the seam of the waistband, thread new elastic through with a safety pin, join the ends securely with a zigzag stitch or by hand, and close the seam. If you don’t sew, fabric glue can hold elastic temporarily, but stitching is much more durable.
Reinforcing seams before they split
If you notice seam stress (slight gaps, wavy seam lines), reinforce it before it opens. Use a strong polyester thread and a backstitch or small machine stitch twice over the stress points. You can also add a narrow strip of bias tape along the inside seam for extra support. I do this often on light dresses where the side seam bears the most tension.
Repairing leather and suede scuffs
For minor scuffs on leather shoes or bags, a leather conditioner and matching cream polish can work wonders. For suede, brush gently with a suede brush and use a suede eraser on marks. For deeper scratches or tears, consider a leather repair kit — these can fill gaps and colour-match the area. I tend to leave extensive leather work to a pro unless it’s a small scuff I can handle with polish.
Stain emergencies: what I do first
Address stains immediately. Blot (don’t rub) with a clean cloth, then treat depending on the stain: cold water for blood, club soda for wine, a small dab of dish soap for oil. For set-in stains, an oxygen-based cleaner (like OxiClean or Vanish) often lifts them without damaging colour. Always test on an inside seam first. I avoid bleach unless the care label explicitly permits it.
When to accept a visible mend
Not every repair needs to be invisible. I love visible mending — a bright stitch or an appliqué patch can turn a repair into a style choice. If you’re repairing a favourite vintage tee or a childhood jacket, visible mending with colourful thread or decorative patches celebrates the garment’s life. It’s sustainable and personal.
When to call the tailor
Leave complex repairs — like replacing a difficult zipper, re-lining a coat, or resizing a structured blazer — to a skilled tailor. Tailoring is an affordable way to transform an item and is especially worth it for better-quality pieces. I’ll DIY small repairs, but I happily pay a local seamstress for work that demands precision.
| Problem | Quick fix | When to call a pro |
|---|---|---|
| Loose button | Sew back with matching thread | Decorative or shank buttons on coats |
| Popped hem | Iron-on hem tape or blind stitch | Silk or lined garments |
| Stuck zipper | Lubricate with graphite or wax | Broken teeth or damaged slider |
| Small knit hole | Darn or needle-felt | Large tears or worn-out knit |
These everyday repairs have saved me so many pieces I wouldn’t part with — a raincoat with a renewed zipper, a cashmere jumper with neat elbow patches, jeans with stitched-on reversible patches. Mending is practical, creative and sustainable, and once you start, it becomes a lovely ritual that connects you to the clothes you love.